
Studio & editing
Trim a take, arrange media and add captions, sound and styling before exporting a local video.
From a recording to Studio
Studio turns your recording into an editable timeline. Cuts, placement and styling change the composition without rewriting the original capture. Keep the project and its sources to continue editing later.
Record a take
Choose Recorder, select a screen, region or window, and enable the camera and audio you need. Stop and let Beam finish saving the take.
Open a retained project
Continue in Studio after recording, or reopen a saved Studio or Instant project from the project picker.
Shape the timeline
Trim the beginning and end, remove unwanted sections and arrange any imported media. Play across each cut to check it.
Polish and export
Adjust the canvas, zooms, cursor, captions and sound, then export MP4 or WebM.
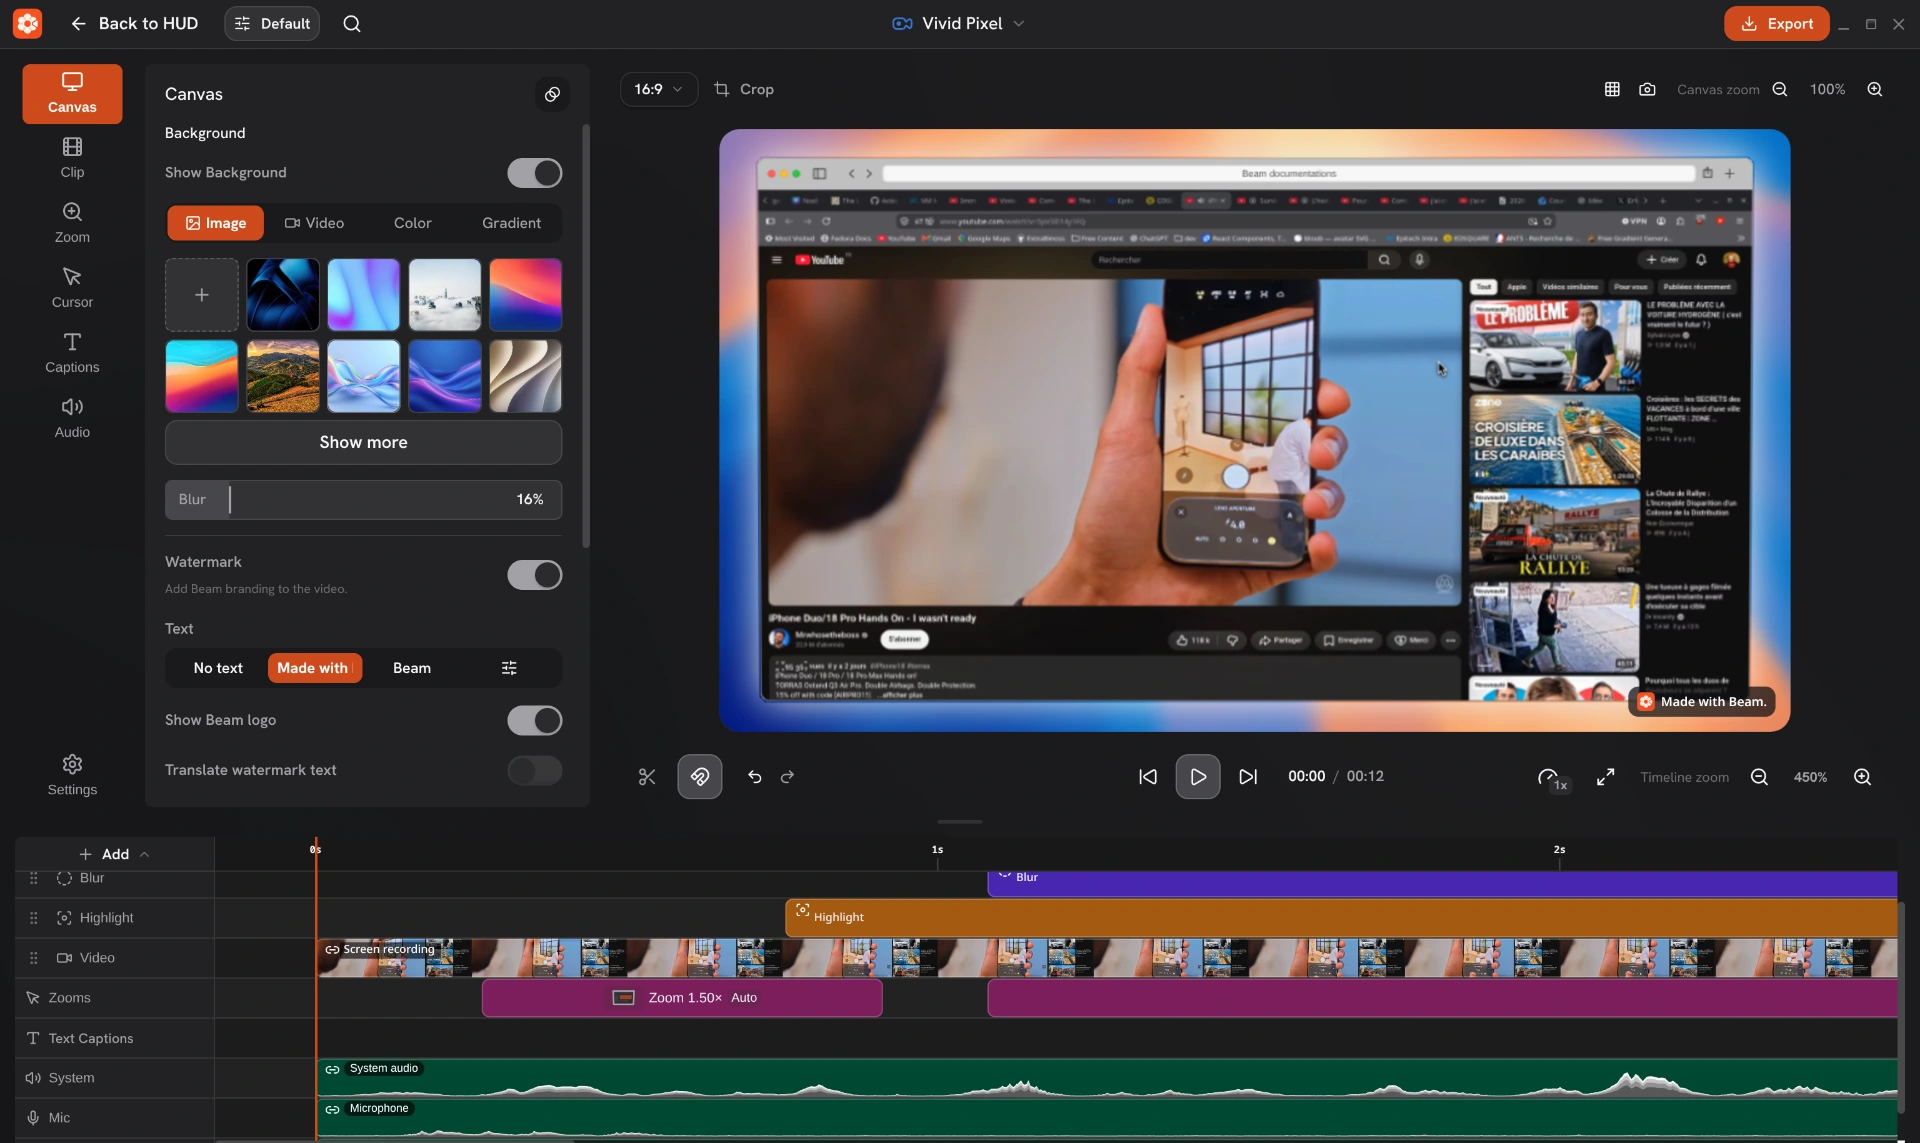
Find your way around the editor
Use command search to find an action, layer or property. A property result opens its inspector section. Available actions depend on the project and your selection.
| Area | What you do there |
|---|---|
| Top bar | Open or switch projects, select an editor preset and export the video. |
| Sidebar and inspector | Open Canvas, Clip, Zooms, Cursor, Captions or Audio. Select an item to see its properties; Settings opens the shared application preferences. |
| Canvas | Preview the result, position visual layers, crop a compatible clip or place a manual zoom focus. |
| Timeline | Arrange visual clips, audio, captions and zoom blocks. Resize the timeline area to give the tracks more room. |
| Playback toolbar | Play, pause, jump to the start or end, split a clip, toggle snapping and choose preview quality. |
Add media or record a voiceover
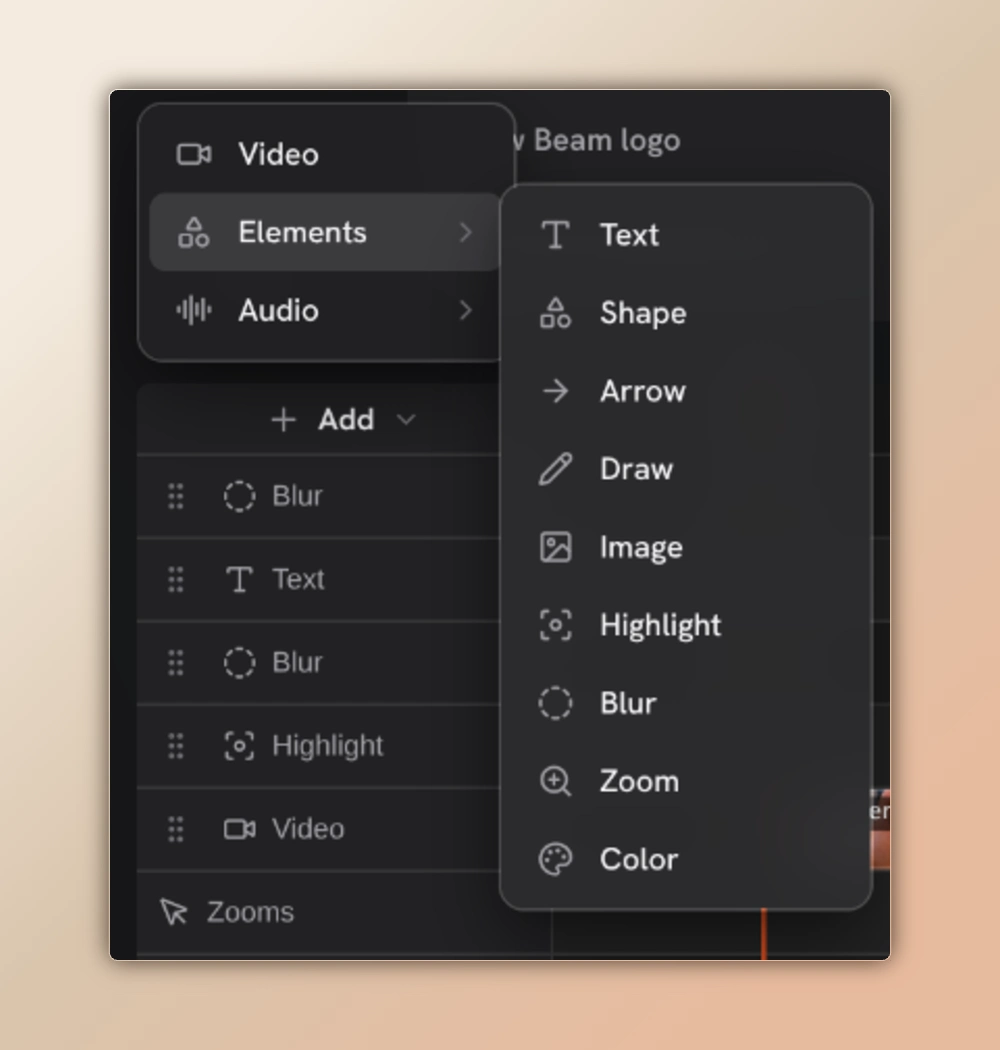
Open Add beside the timeline to insert content at the playhead. Choose Video directly, or open Elements or Audio. Pasting an image from the clipboard adds it to the composition.
| Menu | Available content |
|---|---|
| Video | Import a video file onto the timeline. |
| Elements | Add text, shapes, arrows, drawings, images, highlights, blur regions, zooms or color layers. |
| Audio | Import a sound file or record a voiceover at the playhead. |
Cut and arrange the take
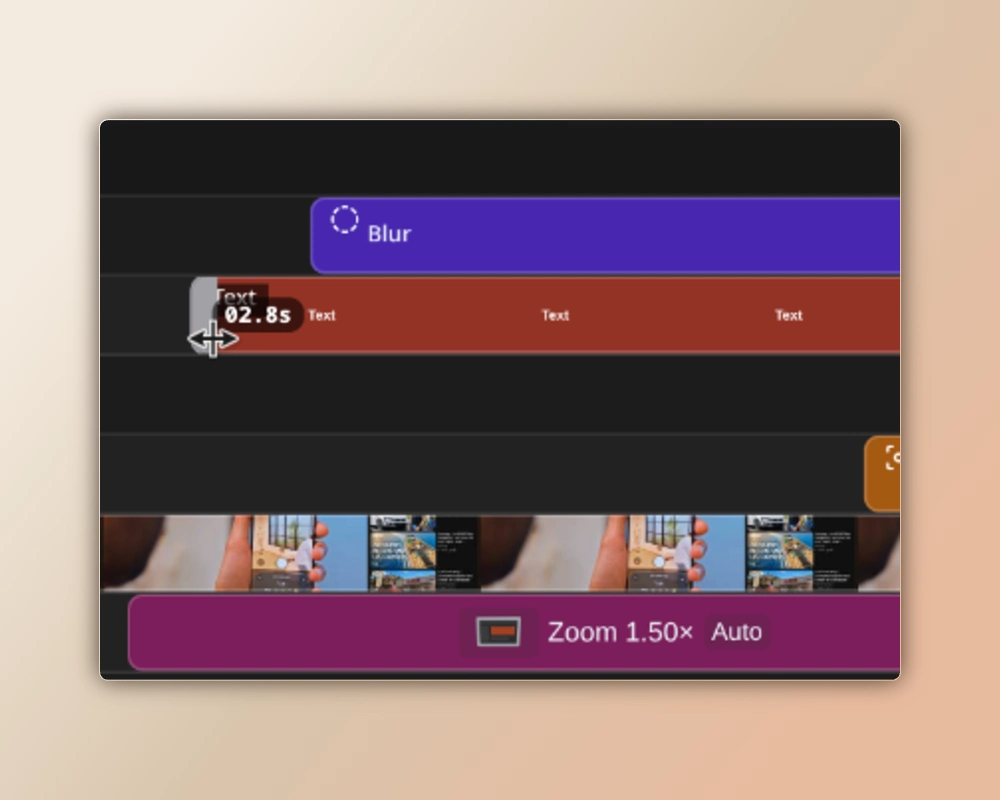
Screen, camera, audio and generated overlays may be linked, so moving or trimming one can affect its companions. Review linked tracks together. Lock content from the timeline context menu when you want to protect it from edits.
Select the clip
Select the clip and move the playhead to the edit point.
Trim its edges
Drag either edge to trim. Drag the clip body to change its timeline position. Keep snapping enabled when you want to align with nearby boundaries.
Split and remove
Place the playhead inside a compatible clip and use Split, or S by default. Delete the unwanted part, checking whether the chosen deletion mode keeps or closes the gap.
Check the result
Play across the edit. Reorder visual tracks to change stacking, and use a gap control when you want to close an empty interval.
Select and protect timeline content
- Click clips or drag a selection rectangle. Track headers select their items; modifier-assisted selection can include more tracks.
- Copy, cut and paste at the playhead with Ctrl/Cmd + C, X and V by default, or use the timeline context menu.
- The primary selection opens the inspector. Changes apply across a selection only where the items support that property.
- Caption text and Follow Cursor apply to the selected caption. Crop requires one compatible visual clip.
- Disable content to keep it in the project without rendering it. Unlock protected items before deleting or changing them.
Set the canvas and visual style
Choose 16:9, 9:16, 1:1, 4:5, 3:4, 4:3 or 21:9 in the canvas toolbar. In Canvas, set the background, padding, corners, blur and watermark. Backgrounds can use solid colors, gradients, or library and imported images or videos.
- Select a visual clip to adjust position, size, rotation, mirroring, opacity, rounding, shadow, border and supported frames.
- Crop a compatible clip on the canvas, then confirm. The original source stays unchanged.
- Select text or drawing layers to edit their properties. Text also supports inline editing on the canvas; freehand strokes remain editable.
- Position Blur or Highlight layers over the area you want to obscure or emphasize, then adjust their bounds and appearance.
Add focus and motion
Use 2D or 3D camera zooms to move the composition, or Loupe to magnify one area. Place zooms manually or generate them from captured clicks. Cursor controls style the separate pointer overlay, including its size, color, shadow, click effects and smoothing.
- Use entry and exit transitions on supported clips. Canvas background transitions have separate controls.
- To pause on a frame, place the playhead inside a supported screen, video or webcam clip and choose Hold Segment at Playhead from its context menu. Unlock the clip first; an existing frozen segment cannot receive another hold.
- Real cursor records the system pointer into the source pixels. Styling the separate cursor overlay cannot remove that recorded pointer.
Add captions and adjust the sound
In Captions, choose an available audio source and Whisper model. Download the model once, then generate captions locally. Review the recognized words and timing. Text captions and captured keyboard shortcuts are separate content with separate styling.
- Select a text caption to edit its wording, typography, background, position and highlighting. Keyboard captions show recorded shortcut steps.
- Use Audio to enable or mute sources, adjust volume and normalize supported audio. Select an individual audio clip for its own settings.
- Record through Add → Audio → Voiceover. Its countdown offers Off, 3, 5 or 10 seconds; monitoring project audio is optional. Check the resulting mix before exporting.
- Export transcript (JSON) saves enabled text captions with timeline timestamps. It excludes keyboard captions and does not create an SRT or VTT file.
Inspect the edit
The camera button in the canvas toolbar creates a Screenshot project from the current composed frame. Use it to annotate or export that frame as an image.
| Control | Scope |
|---|---|
| Playback Quality: Full, Half, Quarter | Changes playback resolution in the editor. Export uses the dimensions and quality selected in the export dialog. |
| Canvas viewport zoom: 25%–500% | Changes your working view. Click the percentage to reset the fitted view; middle-drag or Space-drag to pan. |
| Timeline zoom: 100%–3200% | Changes the visible time scale. Ctrl/Cmd + wheel zooms around the pointer. |
| Grid and fullscreen preview | Help with alignment and inspection. The editor guide grid is omitted from exports. |
Save a look for the next video
Studio saves the composition and presentation after changes settle, so reopening restores the edit. Undo and redo keep up to 50 snapshots in the current editor session; this video history is not restored when you reopen the project.
- Video presets store reusable presentation, cursor, zoom and export defaults. Studio and Instant share them. Screenshot has its own preset library.
- Beam remembers ongoing changes in Default automatically. Named presets show unsaved changes and offer Save; use New, Rename and Delete to manage them.
- Presets reuse a look. Projects keep the actual timeline and source media; keep the project to revise a delivered video.
Default editing shortcuts
Change these bindings in Settings → Keyboard Shortcuts. Finish typing in a field or close a dialog before using an editing shortcut; focused inputs keep their normal text controls.
| Shortcut | Action |
|---|---|
| Space | Play or pause; hold while dragging the canvas to pan the viewport. |
| S | Split a compatible selected clip at an interior playhead position. |
| Ctrl/Cmd + Z | Undo the previous edit. |
| Ctrl/Cmd + Shift + Z or Ctrl/Cmd + Y | Redo an edit. |
| Ctrl/Cmd + C / X / V | Copy, cut or paste timeline content. |
| Delete or Backspace | Request deletion of selected clips or zooms. |
| Escape | Cancel a crop or clear the timeline selection; exits fullscreen preview when it is open. |